The Mines of Moria
| The Mines of Moria | |
|---|---|
| ◄Eamon adventure #108► | |
 | |
| Author | Sam Ruby |
| Released | August 1985 |
| Revised |
8 April 1990 (DOS) 29 September 1991 (ProDOS) |
| EAG number | 108 |
| EDX number | 09-01 |
| EDX set | The Sam Ruby Adventures |
| Native format | Apple DOS 3.3 |
| Files |
Eamon 108 - The Mines of Moria.dsk Eamon 108 - The Mines of Moria (ProDOS).dsk |
The Mines of Moria is an Eamon adventure written by Sam Ruby based on characters and settings from the works of J. R. R. Tolkien, and is the first story in Ruby's three-part Lord of the Rings series. It was released in August 1985 along with the second part, The Forest of Fear.
Background
The Mines of Moria is the first of several Middle-earth adventures by Sam Ruby and is set largely in the subterranean kingdom of Khazad-Dûm, later known as Moria, which author J. R. R. Tolkien first describes in chapters four and five of The Fellowship of the Ring (1954). As in Tolkien's original, Ruby's adaptation begins at the west gate of Moria and takes the adventurer through various winding halls and violent encounters in pursuit of the adventure's quest.
The adventure is the first of three installments in what Ruby called his Lord of the Rings series and was released in August 1985 along with the second part, The Forest of Fear. The third installment, The Ring of Doom, was released in June 1986. In later notes, Ruby wrote that playing through the adventures in order "is not totally necessary but is highly desirable."
In January 1987 Ruby released a second set of Middle-earth adventures called the War of the Ring series.
Premise
The Dark Lord Sauron has been gathering vast armies of evil creatures and will soon be strong enough to attack and conquer the free people of Middle-earth, but a pair of brave fighters — a wizard and a ranger — recently succeeded in smuggling out of Sauron's fortress some vital information about his plans that will be of great help to the resistance. They holed up briefly at the Main Hall, but knowing they would be pursued they chose to return to the free lands using a path that Sauron wouldn't expect: through the halls of Moria, the long-abandoned dwarf city beneath the Misty Mountains.
The pair disappeared in Moria and never returned, but they left a copy of the intelligence with the bartender at the Main Hall, with instructions that a brave adventurer be found to fulfill their mission: to pass through Moria and deliver the vital information. You are that adventurer.
| Full introduction |
|---|
|
It is a bad time for the free people. The forces of the Dark Lord, Sauron, are swarming over the world. Armies of orcs, trolls, and evil men and beasts are strengthening the shadow that will soon envelop the earth. For the moment, the land of the west (which you are on) is protected by the Misty Mountains, which Sauron is not yet ready to cross. But you, the Main Hall, and the free lands and people of the west are not safe! The men of the south, who have been fighting bravely against the Dark Lord, cannot hold out for long against Sauron and his growing power. But there is hope. At great risk, a wizard and his ranger companion smuggled information out of Sauron's fortress which could be of great use to the men in the south. They could not deliver the information right away, so they waited at the Main Hall. When they finally set out, all paths through the Misty Mountains were blocked due to winter storms. Realizing that Sauron would stop them if they tried to take any normal paths, the two men decided to take a path that the Dark Lord would never think of watching... because the way is more terrible than his army! I'm talking about... the Mines of Moria. Built by the dwarves long, long ago, "Khazad-Dûm" — the Halls of the Dwarves — became the center of dwarfdom. Skilled dwarvish miners built a kingdom under the Misty Mountains. The mines produced unmeasurable amounts of gold, silver, iron, jewels, and most important... mithril! The most valuable metal on earth!!! But the dwarves dug too deep, and awoke evil things far below the earth. Many dwarves were slain, and the rest were forced to flee. The doors were shut, and Khazad-Dûm was renamed Moria... the Black Chasm. The wizard and ranger were never heard from again. However, the wizard left a copy of the information with the bartender at the Main Hall, telling him that if he was not heard from to give it to a tough and trustworthy adventurer to take it to the men of the south. In case you haven't figured it out yet, the bartender is sending you on the mission! You read the letter. It says: "If you are reading this, then I have failed. Your mission is perilous and difficult. You will enter Moria from the west, survive in Moria, and find the exit — 'East Gate' — on the other side of the mountains. Once there, you must deliver this letter to friends. Elbereth." (The rest of the letter — the information — is written in a strange language which you cannot read.) The letter is signed with a strange rune which seems to be a "G". May the Valar be with you! |
Walkthrough

There's plenty of combat to be had in the depths of Moria, and though a seasoned and heavily-armed adventurer like Sam can handle it without much difficulty, a less experienced fighter may find some of the encounters quite challenging, so take your best weapons and be sure your character knows every spell. Thankfully Ruby includes multiple companions who'll aid you on your quest, and though the mines are laid out in a fairly linear fashion with most combat unavoidable, there are some fights that you'll be able to bypass if some unlucky rolls have left you injured.
You begin on the Old Road west of the Misty Mountains.
- Go south to where a path branches east. If you continue farther south you'll get into a fatal fight with a pack of thieves, so take the path.
- You arrive at the base of a cliff near a dark pool.
Examineyour surroundings to discover a door concealed in the wall, then examine the door to reveal some writing: "Speak, my friend, and enter!" If you say "my friend", the door opens and the tentacled Watcher in the Water immediately rises up from the pool and blocks your passage west. - Take the door east into Moria; the Watcher slams the entrance shut behind you.
First level
- Go east onto the stairs and collect the fallen staff which you may
lightfor illumination. - East again is an intersection with a vacant guard post to the south. Enter the chamber and examine it to find a large gold key, then return to the passage.
- Continue east to reach a four-way intersection. The way forward is east, but first check the side passages.
- The north passage ends only in a cave-in where three giant spiders lurk.
- The south passage leads first to a bend where a small party of four orc fighters are waiting, then to the orcs' headquarters where you'll encounter two more orcs and an Uruk-hai. Dispatch them all and collect the black orc-brew (a healing potion), then open the desk to find a silver key. Return to the intersection.
- Go east to the next intersection and find a metal gate which you can open with your silver key.
- Take the tunnel north, fight the troll, and explore the two side chambers: they're prison cells where guards are holding a dwarf and a wizard. Slay the guards and free the prisoners who turn out to be Gimli and Gandalf! Return to the intersection.
- A crack blocks your way east but you can
jumpit to get to the other side. - Follow the tunnel east. The small side chamber to the south is home to an army of ants, but there's also a locked box there that you can collect.
- Going further east along the tunnel will trigger a trap door that drops you into a pit (though if you fall in you can climb back out); instead
jumpto reach the other side. - Here there's a sign that warns of danger to the east — a deadly, miles-deep pit — so instead enter the small square room to the north and examine it to reveal a small keyhole concealed in the wall. Insert your gold key and a panel with a lever appears; pull the lever and the room (an elevator car) descends to the next level.
Second level
- Descend the stairs from the elevator and go east along the tunnel, passing the first exit south which leads only to the same deadly pit you avoided earlier.
- Where the tunnel bends south, examine your surroundings to find a secret exit east that leads to an equipment storage room where you can grab some mining tools.
- Follow the tunnel south and east to a T-intersection, then take the side tunnel that leads south toward a glow.
- You arrive in a large chamber dominated by a dragon guarding a hoard of treasure. Attack the dragon, fleeing and healing if needed; once defeated it will drop its treasure, but if you examine the room you'll find something even better: the Arkenstone, a unique, gleaming jewel and precious heirloom of the dwarves.
- Return to the main tunnel and continue on to the next intersection. Open the gate leading north and step through.
- Fight the three lizards lurking in the tunnel and go north to the second intersection.
- Examine the intersection to find a hidden passage which leads west into a secret chamber dominated by a pillar. Fit the Arkenstone into the pillar and light will play through it, casting a message on the wall: "Who disturbs the sleep of Durin the Deathless? Speak now and enter!" Say the word "Now" and a second door will open leading to the tomb of King Durin himself where you can search to uncover a mithril key. Return to the first chamber and you'll be joined by a friendly, animated statue of the king.
- Continue to follow the tunnel north and you'll be stopped by a caved-in area, but the tools you picked up earlier will let you
mineyour way through. - The tunnel ends at a subterranean river; follow it east to reach a lake and battle a kraken.
- Dive to the bottom of the lake and you'll find your way into a flooded hallway. Follow it east, ignoring the north exit that leads only to a deadly whirlpool, and you come to some stairs leading down to the next level.
Third level
- Open the gate with your mithril key and enter a long east-west passage flanked by six sets of living quarters. If you're up for some fighting you can clear out the orcs and trolls inside; otherwise press east.
- At the four-way intersection, first check the east room where you'll find a valuable necklace. The south tunnel leads only to a fatal encounter with an army, so head north.
- This tunnel starts north, bends east, and ends south, and is filled with a variety of monsters: a vampire, a friendly orc named Clumsy, a pair of orc patrollmen, Hank the troll, and Azog. Fight your way through.
- Reach a large chamber and exit east onto the narrow Bridge of Khazad-Dum where you'll be stopped by the fearsome Balrog. It's nearly invincible in combat, but by blasting the bridge you can send it crashing into the chasm.
- Go through the large hall to the east gate and you'll finally exit Moria.
Lothlorien
- Take the path down the mountains and into the forest.
- At the gate, speak the word given to you in the letter ("Elbereth") and you'll be granted entrance to the elf village.
- First visit the elf captain in his house to the south, who depending on what you trade him will give you things like lembas bread or a carved wooden statue.
- Finally go east to the Field of Galadriel and meet the Lady of Lothlorien. Give her the letter and your mission is complete!
Another walkthrough for this adventure was written by Jared Davis in 2005.
Location
Geographically the adventure spans from the Old Road west of the Misty Mountains, through the lengthy caverns and tunnels of Moria, and out to the woodland realm of Lothlórien in the east, a distance of well over a hundred miles in Tolkien's world but presented in a more compact form by Ruby. The adventure also suggests that Eamon's Main Hall, or more likely a connection to it, is situated somewhere west of the Misty Mountains.
Trivia
- The adventure's introduction notes that Gandalf was accompanied by an unnamed ranger during their failed attempt to pass through Moria, a reference to the character Aragorn. Once the adventurer frees Gandalf, he mutters that the ranger escaped and was not able to free his companion.
Gallery
-
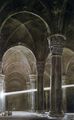 Moria by artist Alan Lee
 -
 Adventure map by Frank Black


External links
- EAG Online: Master List
- Eamon Adventure Browser: The Mines of Moria
- The Interactive Fiction Database: The Mines of Moria
- Interactive Fiction Reviews: The Mines of Moria
- The Unofficial Home Page of Eamon Games: The Mines of Moria
| ||||||||